Showing posts with label preserving. Show all posts

Wednesday, 7 September 2011

How to Make Plum Vodka, Plum Rum (and probably any other plum based alcoholic beverage too!)

Last year we sampled some of my friend's damson vodka, which is totally delicious, and as we have an over abundance of plums this year, me and mum decided to make plum vodka.  We also found some Bacardi in the cupboard that someone gave us, so we made plum rum too!  There are lots of directions on the interweb that require heating the vodka and dissolving the sugar into it, we decided that was a bit of a faff and basically bunged sugar, booze and plums into a kilner jar...here's how...

1.  Clean the plums, cut off any manky bits and cut them into halves, weigh them, then measure about half their weight in sugar (so if you had 500g of plums you need 250g of sugar).  Put them in a big kilner jar.

2.  Add the vodka/rum/any-other-alcohol-you-suspect-would-be-improved-by-adding-sugar-and-plums to the kilner jar, this is where we weren't very scientific and just added the whole bottle rather than measuring anything out.

3. Shake the kilner jar until the sugar has dissolved (takes a long time, good exercise though!)

4. Keep in a cool, dark place, shake every day, for upto 3 months.

How to make plum vodka, plum rum and probably any other plum based alcohol! Plum rum is yummy! Second hand Susie blog.

This is the plum vodka just after we made it, before vigorous shaking commenced.  Below is the vodka (small jar - 1.5 litres) and bacardi (big jar - 2 litres!) about 3 weeks after we started it...mmmm....

How to make plum vodka, plum rum and probably any other plum based alcohol! Plum rum is yummy! Second hand Susie blog.

We're going to decant it into small dainty bottles to give as Christmas presents this year! 

Friday, 24 September 2010

Drying Rose Hips for Tea and Chillies for Chili Flakes and Freezing Garlic...

Last week we visited the seaside town where I went to uni  and we had a lovely day on the beach.

We went for a walk down the riverbank, where I spotted a load of wild rose bushes all with hips on them.  I've been thinking about rose hips for a while, they're mentioned in a couple of the books I have as really good sources of vitamin C and Alys Fowler's book says you can make tea from them.  I try my best not to buy any imported fruit and veg, but during the winter it's hard not to, so I thought I'd try out this way of getting some extra, homegrown vitamin C (I'd really like to have a go at making rose hip syrup like they did in the war, but I didn't pick enough hips).  Having returned home and calmed down a bit from the rose hip picking mania, I did some research and found out that it's really a bit too early to pick rose hips - you should wait until after the first frost, but I can't waste the ones I've picked now, I'm going to make tea with them!

Firstly, I found this conversation on a gardening web-forum useful when I was having a mild panic about the possibility of poisoning myself from poisonous rose hips!

I wanted to dry my rose hips whole, but didn't know if this would work and spent ages trying to find somewhere that would tell me - eventually I found this site, which told me it was fine.  So I washed the rose hips in some salty water (I think this kills bugs or something, my mum always says to do it!), got rid of the stalks and flower heads, then whacked them onto my dehydrator and away we went.


Now they're safely stored away in a jar.  I'll have to experiment with the tea making, but from what I've read I think if I boil a couple of hips in a saucepan of water for 5-10 minutes I should get tea!
I also picked a lot of chillies of my plants, too many to use straight away, so they went into the dehydrator too.  I wish I had worn gloves to chop my chillies up, my hands are sooo sore, they feel like they're burning and I haven't touched a chili for hours!  I've washed them with soap, alcohol (gin!), salt, oil and lemon, and they're still burning. :(  Once they were dried I popped them in a jar, later I can either crush them with my pestle and mortar to make chili flakes or drop them whole into stews and things.


I also peeled all the garlic I'd grown and put them in a jar, jar in the freezer, it seemed the simplest way and it seems to have worked, although I haven't used them from frozen yet so we'll see then!

Saturday, 4 September 2010

Adventures in Making Fruit Leather...

After my blackberrying adventures last week I decided to make blackberry fruit leather in my dehydrator with the berries I hadn't eaten up...it was super easy, but I think I made my mixture too runny - my leather is really thin!  It tastes nice though!

Here's how to do it...

1. Wash blackberries, in salted water, to make sure there's no wildlife in it.

2. Put blackberries in a blender with some lemon juice (I'm not sure why, I googled making fruit leather and most of the instructions I found said to add it, I think it helps to preserve stuff and it makes it tangy) and some icing sugar, blend it up then taste it, add more sugar or lemon until it tastes nice.

3.  Sieve the blended mixture to get rid of pips.

4. Pour the mixture into your dehydrator (line with baking paper first!)

5.  Dehydrate!  Until it's stopped being sticky and it comes away from the baking paper in one piece (this is where mine went a bit wrong I think, mine would only come off in little funny shaped bits)

6.  Store, in bits or rolled up, I covered mine in icing sugar to stop them sticking together.


As you can see, it's very thin!  Has anyone who's (successfully!) made fruit leather tell me where I went wrong!? 

Monday, 16 August 2010

Garlic Harvest and How to Preserve Garlic...(also garlic pinkness!)

I was did some gardening this afternoon (you know those days when you don't really plan on doing gardening, so you wear your clean trousers and a white vest top, then you start noticing weeds and then five minutes later you find yourself armed with a hoe and a trowel, flinging soil about while trying to keep your clothes clean, it was one of those days today...)  I noticed that most of my garlic plants had gone completely yellow and brittle and dead looking, so I decided to dig up the remainder of the bulbs.

See!

Oh aren't they so pink and purple and lovely.  They are quite small but you can't have everything!  I think after the past two years garlic-in-pots failures I've definitely learned that they don't like it and I shall find some nice real ground for them to go into next time.  Still, they are pink, so at least that's happy!

Now I have to find some way to preserve all this garlic - I was planning on plaiting the stalks together and hanging it up somewhere (or round my neck a la le french) but half of these don't have stalks and none of them really have a fully formed skin around them, so I don't think they'll keep very well like that.  There seems to be three main ways to preserve garlic - pickling, drying and freezing (has anyone tried any of these methods?  I'd love to know the results!?)  I dislike le pickle, so I can discount that straight away. I think I'm going to try to freeze it this time - I'm going to let the garlic dry out a bit (apparently when the garlic loses moisture the flavours inside get more concentrated and I want my garlic to be garlicky!) then crush it, mix it with a little oil (to stop it completely sticking together), put it into a jar and put it in the freezer.  Before I preserve the garlic I have to wait for it to get more garlicky, so I'll update with how this garlic freezing plan works when I do it!

This site has lots of information about the health benefits and sciencey bits about different types of preserved garlic as well as how to preserve garlic and store it in lots of different ways.

Monday, 11 January 2010

How to Freeze Cookie Dough...

As well as freezing my buns off making Fred the snowman,


I've also been busy freezing my vegan cookies, so I can just put one or three into the oven when it's on and have vegan zero-waste cookies whenever my heart desires.

The cookie recipe I used here makes about 30 cookies, so to stop myself exploding I scooped lots of balls of cookie dough onto a baking tray and put it flat into the freezer overnight.

The next day I transferred all the cookie dough balls into a plastic box then put them back in the freezer to take out as I need them.

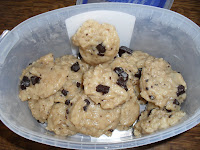
This is the first time I've frozen cookies like this - I usually just freeze the whole lot of dough together then defrost it and make a big batch of cookies. I was worried they'd all stick together, because I didn't use any greaseproof paper or anything, but they seem to be fine - yey!

Tuesday, 3 November 2009

Oh food dehydrator of joy!

I bought this with the last of my birthday money, I've wanted one for sooo long, and next year when I have my own garden (my friend's contract on her flat runs out in 5 months and then were going to rent somewhere together with room for a veggie patch! Excited!) I have plans to grow all sorts of things and then dry them to eat them when they're out of season, to reduce the amount of imported (ie. with a huuuuge carbon footprint) foods I buy/eat.

If you ever read the Brambly Hedge books when you were little, I'm aiming to have a 'store stump'!
photo from here

I like to name my appliances, so this is Daphne the Dryer! She also came with a free LED torch (if I was being truley eco-friendly I would have declined the free gift as I don't really need it, but I only thought of that after I placed my order) Anyway, the LED torch came in very useful for shining through the holes at the top during 'is it drying, is it drying? is it drying yet?' moments!
After about 8 hours I ended up with this...

This is about 8 apples!